Welcome

Welcome to my blog. My blogging journey began about in August 2009 as a photo-a-day blog which has since transitioned to combine my love of good food and photography. Today, using as many local and fresh ingredients as we can, my boyfriend and myself spend time researching recipes, making our own adaptations, cooking, taking photos, eating, and finally reflecting on all or part of the above listed process here. I hope you take the time to not only read and look at our photos, but please cook some of the recipes yourself. You are invited and encourage to leave feedback as we continue our culinary journey!

Thursday, March 31, 2011

Tex-Mex Stuffed Bell Peppers

Yes, stuffed peppers in a crockpot! These are seriously the best stuffed peppers I have ever had. They were perfect, and easy to make.

Tex-Mex Stuffed Bell Peppers
1 onion minced
6 garlic cloves, minced
2 tabelspoons chili powder
1 tbs vegetable oil
4-6 bell peppers with flat bottoms
1 slice bread
1/4 cup milk
12 ozs ground beef
1 cup frozen corn
1 1/4 cup shredded Monterey Jack Cheese
1/4 cup cooked rice
2 teaspoons minced canned chipotle chili in adobo sauce
salt and pepper

Begin by microwaving the onion, garlic, chili powder, and oil in a bowl for 5 minutes. Stir twice during that time. Cut 1/2 inch off the top of each pepper, chop the pepper tops fine and place in a bowl. Remove the seeds and core from the peppers.

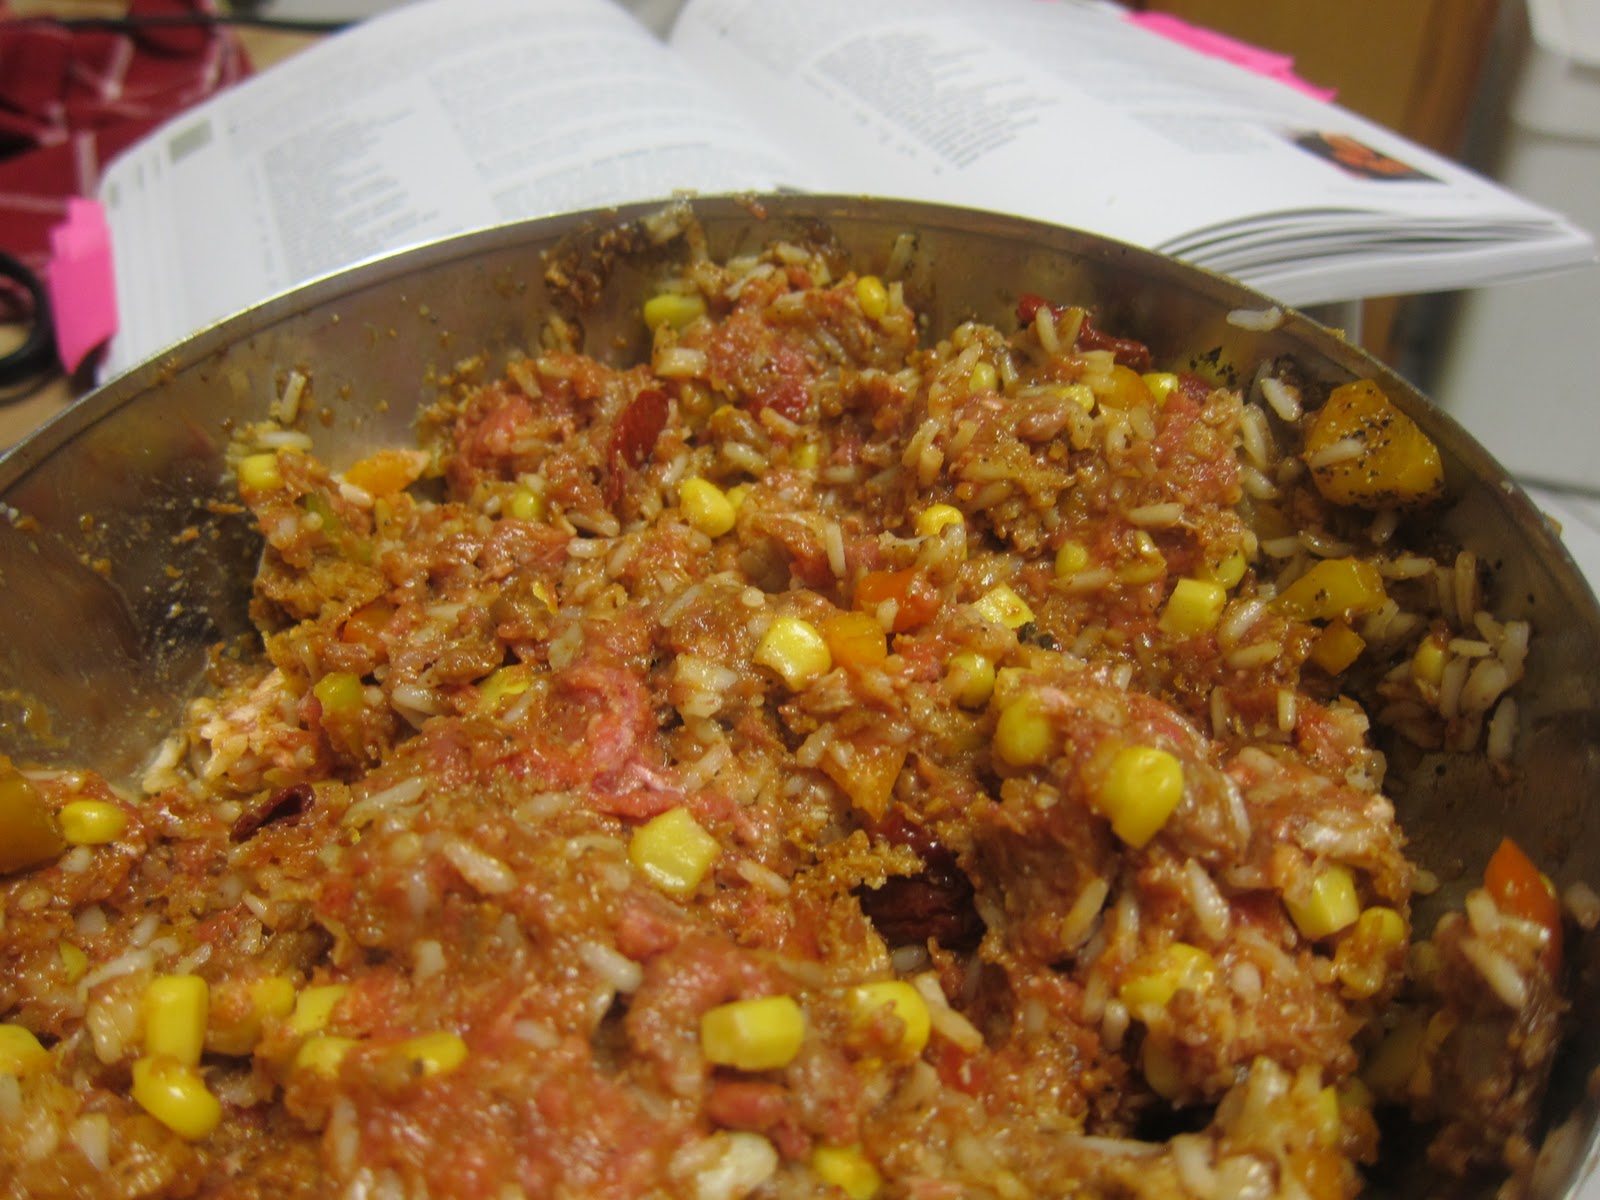
Mash bread and milk into paste in a large bowl. Mix in the onion mixture, chopped peppers, ground beef, corn, cheese, rice, chipotles, 1 teaspoon salt, and 1/2 teaspoon pepper. Save 1/4 cup of the cheese for later. Mix with your hands and place filling into peppers.

Pour 1/3 cu p water into slow cooker and place stuffed peppers upright in your crockpot. Sprinkle with the remaining cheese. Cook for 4-6 hours on low.

Seriously amazing! I don't even know what else to say. This recipe made a lot of filling for me, and luckily I was able to freeze it so we can have this recipe again in the near future. From now on I will cook all my stuffed peppers in my slow cooker!


Saturday, March 26, 2011

Tuscan Bean Soup

I know you were all on the edge of your seats wondering what in the world I would do without my crockpot cookbook. You may remember that I misplaced it about two months ago when we were moving. Strangly, the crockpot cookbook was the only thing that I lost! Unbelievable. I thought eventually it would turn up but it never did.

So, I decided to purchase another new and improved crockpot cookbook! And actually I like this one even better. The book, Slow Cooker Revolution, not only includes great recipes but tips on what specific brands and ingredients to purchase that are best for the crockpot! It also advises you on what shapes you should purchase your meat (i.e. short and fat pork roast is better than long and skinny) and explains why you might want to microwave some ingredients before putting them in your crockpot. It's great and I am very excited. So, to you readers who do not yet have a slow cooker (DAN) purchase one so you can try some of these great recipes. Also, I highly recommend the cookbook (obviously).

We had some leftover pancetta, so for our first recipe we decided to make Tuscan Bean Soup. I was also particularly thrilled to try using dry beans in a recipe. It was great, and we have some at home in the freezer wanting to be eaten for lunch in the next couple of weeks...

Tuscan Bean Soup
1 large onion
8 garlic cloves
6 oz pancetta
3 cups chicken broth
4 cups water
1 tsp rosemary
1 tsp red pepper flakes
1 lb dry cannellini beans
1 tablespoon olive oil
parmesan rind
grated parmesan cheese

Prepare this recipe the night before. Then turn your crockpot on low the next morning and you are good to go!

Soak your cannellini beans in 3 quarts water with 1 tablespoon salt overnight. Begin cooking by prepping the other ingredients. Mince the garlic and onion. I used my new food processor that my mom got me for Christmas: I am very excited about using this new tool to cut onions, I hate cutting onions! Also mince the pancetta. Cook pancetta on the stove in olive oil for about 10 minutes. Add minced garlic, onion, and red pepper. Cook for about 10 more minutes, until the onions are soft and start to brown. Add one cup chicken broth to the mixture and place in crockpot. Add the remaining water, chicken broth, and rosemary to the crockpot. If you have parmesan rind, also add it to the slow cooker. Refrigerate overnight.

In the morning, rinse the salt off of your beans and place in the slow cooker Cook on low for 7-9 hours. Our soup was great, but a bit salty. If your soup is also too salty for your taste: simply dilute with a bit of water. More soup for everyone! Serve warm with grated parmesan sprinkled on top. Enjoy with a salad, or bruschetta!


Tuesday, March 22, 2011

Tahini Baked Chicken

We had some extra tahini from our hummus, so I decided to browse some recipes online to discover how to use my spare tahini. I found a recipe for Spicy Baked Tahini Chicken that looked pretty decent so I decided to give it a shot.

My review is that this recipe was very good, but I would make some adjustments because the flavor was not quite my taste. If I were to make again, I would not add the red pepper or thyme and instead double or triple the lemon. I think this would make a simple and flavorful dish. If you have extra tahini at home, try your own variation.

Spicy Tahini Baked Chicken
4-6 chicken breasts or thighs
1/2 cup tahini
3 tablespoons brown sugar
1 teaspoon dried thyme
1 teaspoon pepper
1/2 teaspoon red pepper flakes
3 cloves garlic
1 lemons zest
juice of one lemon
3 tablespoons water
1/2 teaspoon salt

Place all sauce ingredients in a casserole dish except lemon juice, water, and salt. Mix together. Add lemon juice to thicken sauce.Whisk in water to form a paste, and then add salt to your taste. Add chicken and coat with sauce. Refrigerate overnight; cook at 400 degrees for one hour. Serve over rice.


Saturday, March 19, 2011

Indian Cooking Class

Last weekend Daniele and I took an Indian cooking class at Naveen's Cuisine. The course was planned and promoted through the physical sciences departments at the University of Chicago, and students were offered a special price. D and I decided to check it out. I mean, why not!

We are so glad we did. Naveen's Cuisine has ONLY five star reviews on yelp and I am not surprised. The class was fantastic. It was hands on, entertaining, and fun. Not only that, but I feel confident in replicating any of these recipes at home. The food was great!

If anyone out there is itching for a good cooking class, this is it. Naveen also offers Thai cooking classes. Our menu for that night included: shrimp tikkas, gobi matar, kachumbar, and murgh curry. In case you need a translation, we basically had curried shrimp, an Indian inspired salad, chicken and rice in a curry sauce, and cooked cauliflower and peas.

We learned so much throughout the course of our class from how to appropriately cut a lemon to get the most juice out of it, how to make ginger or garlic paste, how to butterfly shrimp or chicken, where/how to sharpen our knives, when to use or not to use wood cutting boards,  the advantage of having a flat iron grill for your stove, how to safely cut an onion, where to buy Indian spices in Chicago, and how to mince ginger or garlic, among other things. I also love the way Naveen cooks: he advises to try a recipe three times before you decide whether or not you like something, because that gives you time to adapt the recipe to the way you like and make it truly yours.

Take a glimpse at our photos below and if you want any of these recipes, feel free to ask me. We will likely cook them at a later date for posting on our own blog.


Sunday, March 13, 2011

Lentil Soup

For New Years, Daniele's aunt gave us yellow lentils. Apparently this is tradition in Italy and signifies good luck. Who knew!

We've been eating out lately at 'The Nile' (plug for my favorite Hyde Park restaurant) and adore their lentil soup. Therefore, we decided we wanted to imitate their lentil soup and make our own at home. Well, the result of our lentil soup was not even close the soup from 'The Nile.' Everything about ours was different from color, to taste and consistency. Nevertheless, we can't complain-the soup was easy to make and incredibly flavorful. We will be making it again, maybe with some slight modifications.

Lentil Soup
1.5 cups yellow lentils
6 cups chicken broth
1 tablespoon olive oil
1 teaspoon curry powder
1/2 teaspoon paprika
1.5 teaspoons cumin
2 garlic cloves, minced
salt and pepper
lemon, sliced

Rinse your lentils and add all ingredients to a crockpot (except the lemon). Soak overnight and in the morning cook on low for 8 hours. Serve warm with lemons. I also enjoyed mine with some plain greek yogurt.

Note: You don't necessarily need to make this recipe in a crockpot. You could also try it on your stovetop! The crockpot is simply more convenient and easier for us.

Our recipe was great, but needed some modifications. We did not have the right spices at home so I suggest using cayenne pepper and tumeric instead of curry powder/paprika. Also, if you want your soup to be more like 'dal' and less like 'soup', add more lentils. We will be trying out a 'dal' version sometime in the near future. Don't get me wrong though, this recipe is good as is!

Thursday, March 10, 2011

Homemade Hummus (Served with Parmesan Basil Bagels)

D and I had not had the chance to use the food processor my mom had given us for Christmas, so we decided to make hummus from scratch. It turned out beautifully. Try the recipe below to make your own-if you are feeling extra adventurous you could even use dry chick peas as opposed to canned: we simply didn't have time for that last weekend.


Homemade garlic hummus
 4 garlic cloves
1.5 cups chick peas
1/2 cup tahini
juice of 1 lemon
8 dashes of tobacco green pepper hot sauce
1 1/2 teaspoons kosher salt
3 tablespoons water from the chick peas
1 tablespoon olive oil

Place garlic cloves in food processor and mince. Slowly add the rest of the ingredients and puree until one consistency. Taste and add other ingredients to your liking.

We served this hummus on homemade parmesan and basil bagels. Our best bagel recipe ever! We followed the same process outlined here but used the following ingredients: 2 cups warm water, 2 packets yeast, 3 cups all-purpose flour, 3 cups bread flour, 2 teaspoons salt, 1 tablespoon olive oil, 4 tablespoons grated parmesan cheese, 3 tablespoons basil (we made a double batch=24 bagels).

Please note the photo of rising bread and a sleeping foster kitty!

Sunday, March 6, 2011

Chocolate Cherry 'Dump' Cake

I may have said this before but I'm not much of a dessert baker. Sometimes, though, I find a dessert that just hits the spot and believe me, this was it.

D and I had guests over for dinner last weekend, and included in our guests were three children under the age of ten. Therefore we knew dessert was a must. Since we knew we would be busy making the main course, I opted for an easy crockpot option. This dessert is not healthy, but for the occasional treat it will hit the spot.

Chocolate Cherry 'Dump' Cake
1 box devils food cake mix
1 stick butter, melted
1 20 oz can cherry pie filling

'Dump' the cherry pie filling on the bottom of your crockpot. In a bowl, mix melted butter and cake mix together. 'Dump' the batter on top of the pie filling and cook on low for 3.5 hours. Serve warm and topped with ice cream.

If you do prefer a healthier option, I think it could be possible to make this with fresh fruit. One option could be to try the fruit mixture from the cobbler I baked last summer. You could also substitute butter for margarine.

The cake mixture tasted almost like fudge. It was super easy to make and a hit with everyone---next time I am invited to a potluck I will instantly sign up for dessert and make this great combo.

Thursday, March 3, 2011

The Great Meatloaf Disaster of 2011

Last week, I got real excited about trying some new recipes. We had been talking about making meatloaf for awhile so I decided to give it a go...in my crockpot of course!

So, on Monday night I prepared the meatloaf because I knew on Tuesday I would need to work well into the evening. The loaf needed to cook about 6 hours on low so I instructed D to plug it in, turn it on, and make sure the pot was getting warm before he left to teach his class that morning.

We all know what's coming next. D had the best intentions of course. In fact, he thought he had followed my instructions. But he forgot the last part of that sentence: make sure the pot was getting warm. Apparently the outlet the crockpot was plugged into did not work. Oops.

So that's right, my lovely raw meat and egg mixture was sitting out at room temperature for 8 hours. Eww. My inclination was to throw it away but D convinced me to cook it to see what would happen. So that's what we did. I didn't eat much of it after it was finished (I didn't want to be poisoned), but D did eat it, said it was tasty, and most importantly did not die. So here's the meatloaf crockpot recipe if you want to give it a go.

Meatloaf
1.5 lbs ground meat (split evenly between veal, beef, and pork)
2/3 cup bread crumbs
3/4 cup milk
2 eggs
1 tsp salt
1 small grated onion (about 2 tablespoons)
1 tsp sage

In a large bowl, mix all ingredients together and form into a loaf. Put in crockpot and cook on low for 6 hours.

We preferred our meatloaf without the traditional meatloaf topping, however, if you like you could mix together a dressing of ketchup, brown sugar, and nutmeg and toss it on top of the meatloaf about 15 minutes before you serve. D prefers his with mayo.

I'm glad D enjoyed the meatloaf. And probably next time he will remember to make sure the crockpot is getting warm before leaving the apartment. Luckily my mom convinced me to forgive him. After all, it won't be the only mistake he ever makes.